This article may contain affiliate links. For details, visit our Affiliate Disclosure page.
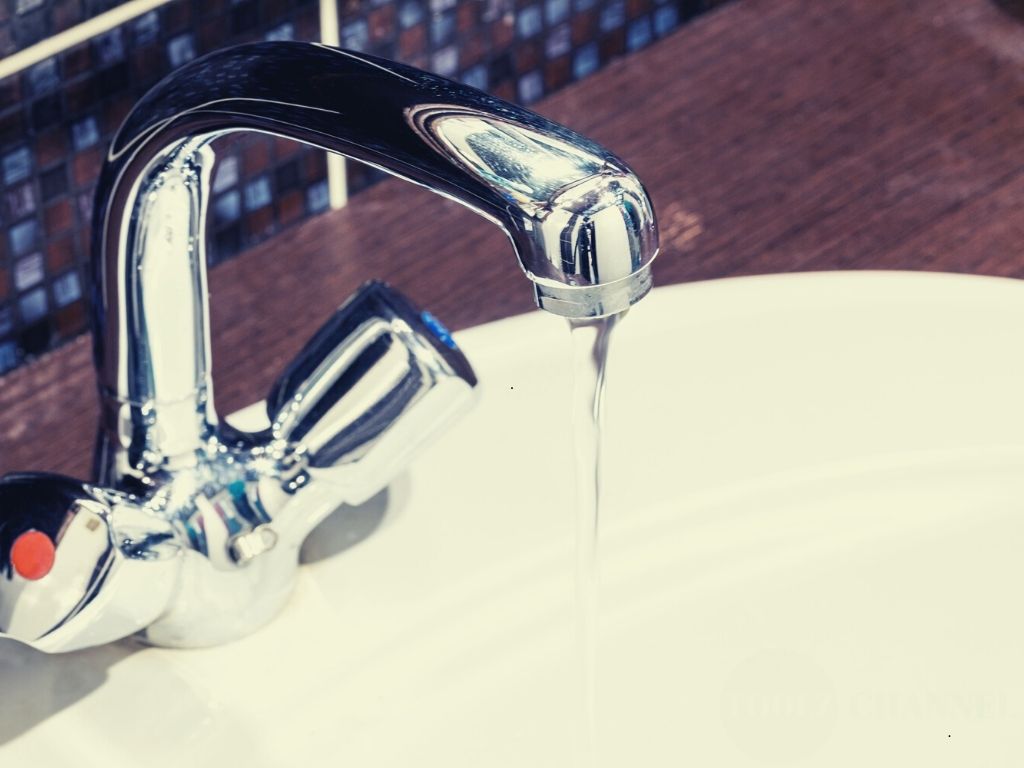
Keep hearing water dripping from your tap can be really annoying and irritated. This problem also can cause your water bills to go up and create a mess in your house. Looking for a way to fix a leaking tap?
Luckily, you can totally repair this if you have a set of needed tools with these 5 easy steps. Why call in a plumber while you can end this leaking issue yourself? Please follow the below instructions, shall we?
Fix a Leaking tap – Tools needed
To have to tap fixed, you will need a few tools below:
- A shifting wrench
- Possibly Allen keys
- Some pliers
- A screwdriver
- Some gaffer tape
- A piece of cloth
You can easily find those in a hardware store.
How to fix a leaking tap guide
Step 1: Turn off the water and empty the tap
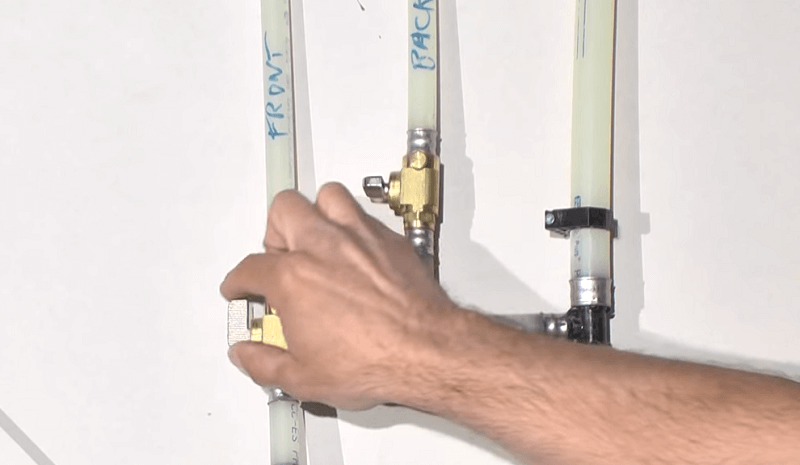
This is the utmost important step. If you start the process without turning off your water, you will have a huge mess to look after.
Your main water shut-off valve is normally located in front of your house, near the water meter, or in the garage. If you live in an apartment, it may be inside the laundry room or your bathroom.
Besides, you may need to turn off the individual water supply valves which are usually close to the appliances. For example, if your sink tap is leaking, there may be a valve closed to the sink. Always double-check.
Remember to empty the tap to get rid of the remaining water.
Step 2: Remove the tap cover and take off its handle
Next, you will need to remove the tap cover (it is the one with the ‘hot’ or ‘cold’ on it). Using a screwdriver may help here, it depends on which type of tap you have.
Then, you need to take off the handle by unscrewing it anti-clockwise. This should be an easy and quick step.
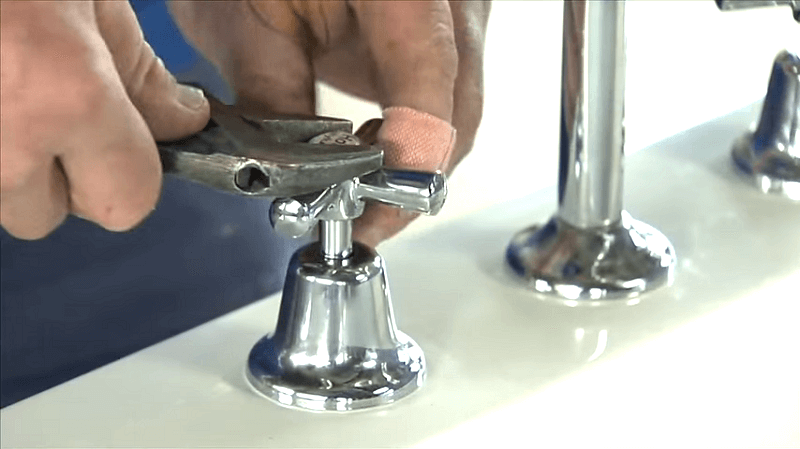
Step 3: Remove the tap skirt/ shroud
To remove the tap shroud or skirt, you will need the wrench to unscrew it. For some stubborn shrouds, you may use pliers and gaffer tape (putting it around the tap shroud) to add some extra grip.
TIP To protect the tap from scratches, you can wrap it with the cloth.
Step 4: Remove the tap bonnet
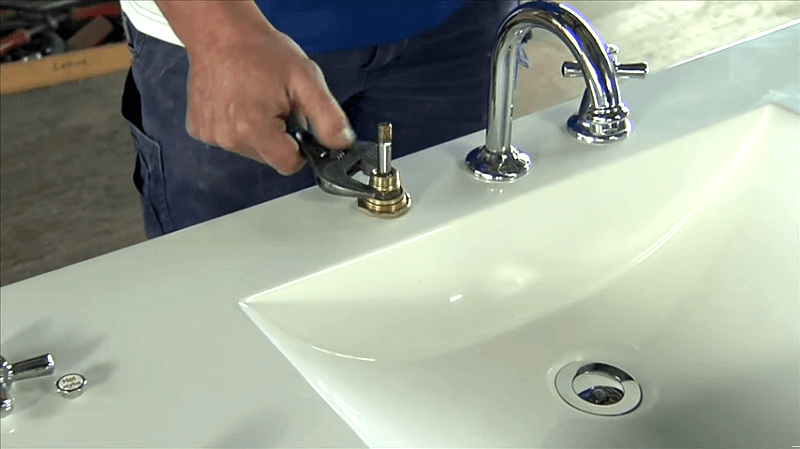
Ok, you are halfway. The next step is to use the wrench or spanners to unscrew the tap bonnet. With the right pressure and position, the bonnet will come off with a couple of turns.
You can wrap gaffer tape around the bonnet to add extra strength. After removing the bonnet, you will be able to see the washer and the jumper valve.
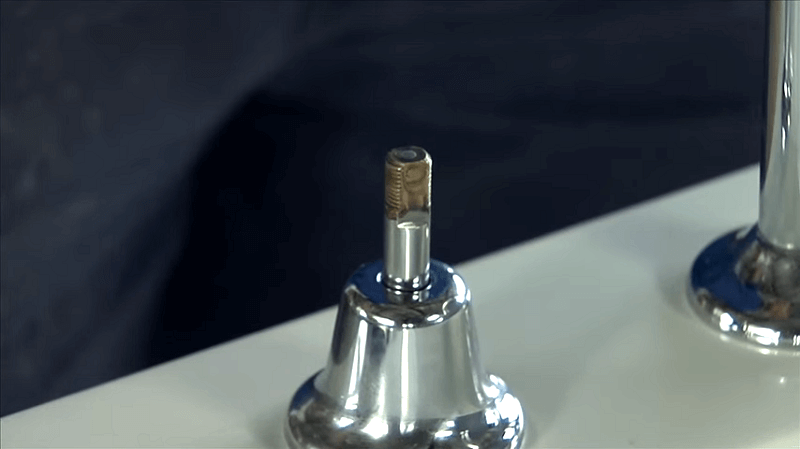
Step 5: Remove the washer and jumper valve
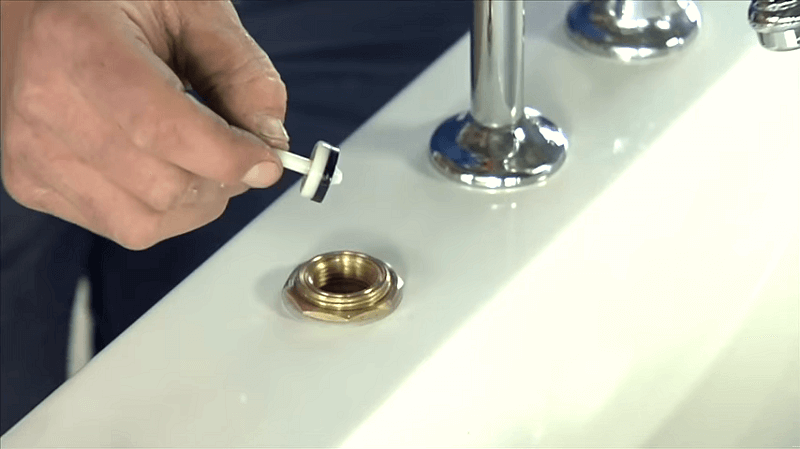
Sometimes, it is not easy to reach the washer. It might be hidden a bit. In this case, just use the head of the screwdriver or a pair of tweezers to gently poke it out.
The washer is our bad guy here. After some time, it is damaged by wear and tear and needs to be changed.
Step 6: Replace the washer and put your tap back
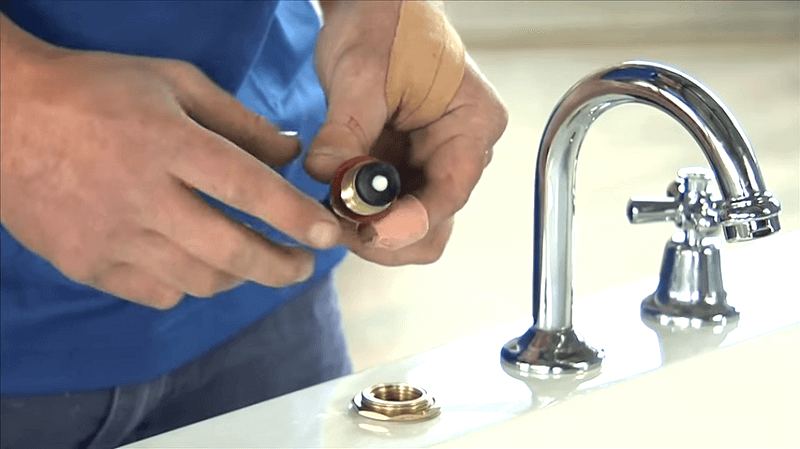
The washer is attached to the jumper valve which is made of brass or plastic. You can replace just the washer or both of them.
Note: Bring the tap washer to a local hardware store to find the exact type and size.
It’s time to replace the washer. Remember the order when you take it out. Now you just need to reverse all the steps. Put the washer and the jumper valve back first, then screw the tap bonnet tightly (use the wrench here). Then, insert the tap shroud and finally the tap cover and handle.
Step 7: Test the tap
Close the tap, then turn on the water mains. Now, turn on the tap to see if the leaking is fixed. If the problem is not fixed yet, maybe you need to reassemble the whole thing.
Note: Remember to turn off the tap completely before turning water mains back on.
FAQs
How to fix a leaking mixer tap
The mixer tap is designed differently from normal taps. It is composed of 3 areas that might need to be repaired when it comes to leaking, the tap washers, the valve seating, and the cartridges. For detailed instructions, please watch the video.
How to fix a leaking mixer tap at the base
From time to time, the mixer tap will be worn out and it is common for this type of tap to leak at the base. The leak around the base of the tap is caused by damaged washers or O-ring under the tap spout. Replacing the washers will solve the problem. Please watch the video for more information.
How to fix a leaking shower tap
The dripping issue may happen to your shower tap, too. With the principles of fixing a leaking tap above, you can handle this yourself as well. Please check out this video.
How to fix a leaking kitchen tap
Shower tap and kitchen tap are used so often by all the members of the family. At some point, you will have a leaky kitchen tap for sure. So, how to deal with this problem, please watch this video.
How to fix a leaking flick mixer tap
For a flick mixer tap, you will have to replace the cartridge if you have a water dripping problem. Please check out this video for details.
Conclusion
I hope you find this article useful and you can save hundreds of bucks for yourself by these 5 easy steps to fix your leaking tap.